2.4.2. Macros
This feature is also available in Excel Add-In Mode (see 1.3. Modes of Running UNISTAT).
As a spreadsheet-based, menu-driven statistical package, UNISTAT does not feature an explicit programming language. However, it does have a powerful macro record/playback facility that enables the user to automate repetitive tasks.
The macro recorder does not save keystrokes or mouse movements. Instead, it records all settings in Procedure Dialogues, namely, variable selections, intermediate data input (text and numbers), output options and command button actions. In graphics procedures, all editable properties of graphs that can be saved in a graphics template file are saved as part of macro files (see 2.3.3.3. Save Template As). Therefore, while saving macro files, you should not worry about having made too many changes or trials, as only the final configuration of the settings are saved in the macro file.
Macro files are in binary format and therefore they are not suitable for editing by the user.
When a macro contains graphical procedures, the Graphics Editor window will not be displayed during playback. To switch on the display of Graphics Editor window, enter the following line in Documents\Unistat10\Unistat10.ini file under the [Options] group:
MacroDisplayGraph=1
In both cases, the image will be sent to the Output Medium as an enhanced metafile object. When the Output Medium is the web browser, the Graphics Editor will always be displayed, irrespective of the value of this parameter.
Normally, UNISTAT graphics axes will be scaled automatically according to the minimum and maximum values in the data series plotted. Under certain circumstances, however, it may be desirable to keep the axis scaling unchanged, as it was during the recording stage. To do this, enter the following line in Unistat10.ini file under the [Options] group:
MacroScaleFixed=1
2.4.2.1. Recording Macros

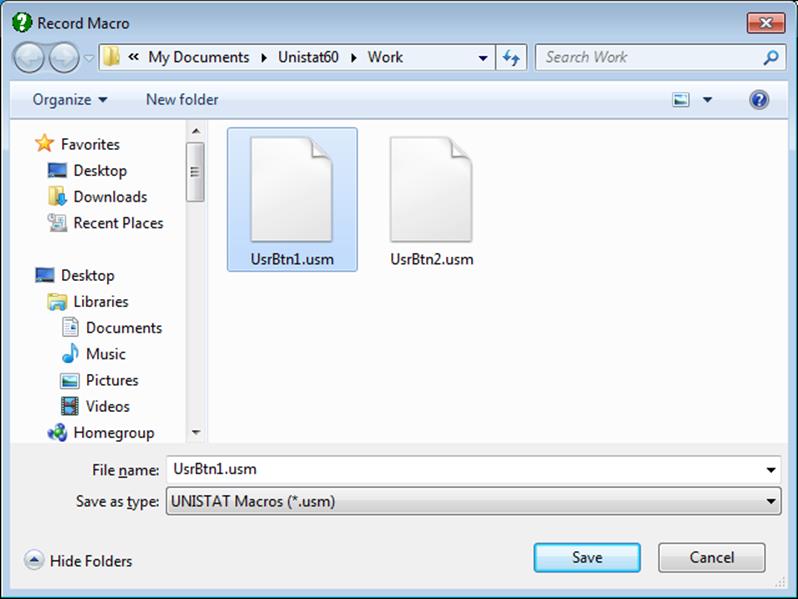
To record a macro file select Tools → Macro → Record Macro. The standard file dialogue will open and prompt for a file name (the default extension is .USM). After clicking [OK] proceed as usual with performing a procedure (graphics or statistics). A single macro file may contain an unlimited number of procedures. It will continue recording until the Tools → Macro → Stop Recording Macro is selected.
2.4.2.2. Running Macros

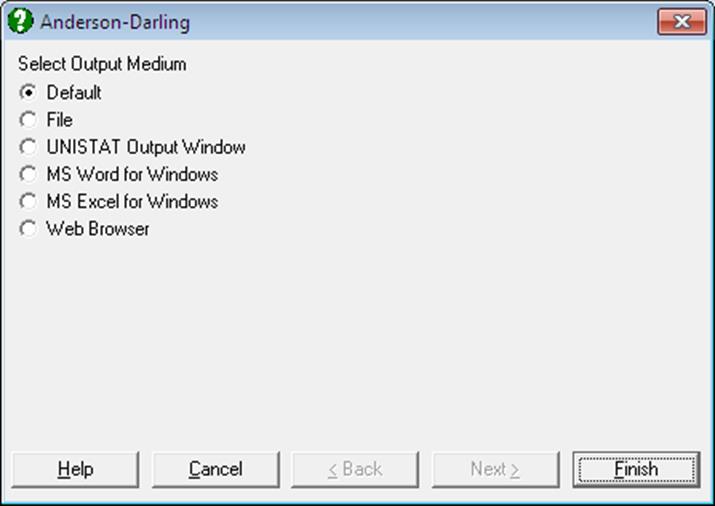
A previously saved macro file can be opened from Tools → Macro → Run Macro. The standard file dialogue will prompt for the selection of the macro file. Once the macro file has been selected, a dialogue will ask you to select the Output Medium to use. The options are as follows:
Default: All output from the macro will be sent to the Default Output Medium
File: The standard file dialogue will prompt you to choose a file name. All text output from the macro will be appended to this file. Each graph generated by the macro will be saved as a metafile in the same folder as this text file. These metafiles will have the names UNISTAT1.EMF, UNISTAT2.EMF, …, UNISTA10.EMF, … depending on which files are already in the folder. So, if UNISTAT1.EMF is already exists in the folder, the first metafile saved from the current macro will be named UNISTAT2.EMF. No files are deleted or overwritten in this way.
If you wish to have a particular graphics output saved with same name each time the same macro is run, then it is necessary to ensure that all metafiles in the folder are deleted before running the macro.
Output Window: All text and graphics output will be sent to UNISTAT’s Output Window. The text output will be in old style line printer format.
Word for Windows: This option only appears if Word is installed. Both text and graphics output are sent to Word. See 2.2.2. Output to Word.
Excel for Windows: This option only appears if Excel is installed. Both text and graphical output are sent to Excel. See 2.2.3. Output to Excel.
Web Browser: This option only appears if a browser is installed. Both text and graphics output are sent to the default browser. See 2.2.4. Output to Web Browser.
It is important to ensure that the data present in the spreadsheet is compatible with the macro to be run.
2.4.2.3. Combining Macros
This option is used for combining two or more macro files into a single macro file. This is often desirable because it is not so easy to record long macro files.
A file open dialogue pops up with a default file extension .USM. It is important to select files in the correct order because this will be the order in which they will succeed each other in the combined macro file. The selected files may appear in the File Name box in reverse order, i.e. the first file clicked becomes the last and the last one clicked becomes the first file in the list.
The output file name is always CombinedMacro.usm and it will be saved to the same folder where the input macro files are. Therefore, you will need to rename this file as soon as it is created, in order to prevent it from being overwritten next time you combine macros.
2.4.2.4. Macro Shortcut Buttons
![]()
This feature is only available in Stand-Alone Mode (see 1.3. Modes of Running UNISTAT).
One or two shortcut buttons can be assigned to frequently used macros on the second Data Processor toolbar, next to the Output Medium buttons. To do this, a macro should be recorded first.
1) Select Tools → Macro → Record Macro from Data Processor.
2) Assign the following path and file name:
Documents\Unistat10\UserButton1.usm
3) Run the procedures you want to include in the macro.
4) When finished, select Tools → Macro → Stop Recording Macro.
5) A button with an icon (1) should appear on the second toolbar.
6) When you move the mouse pointer over this button the tool tip will show UserButton1. You can change the name of the macro to any other by entering the following line:
UsrBtn1=My Macro
under the [Bioassay] section of the following file:
C:\ProgramData\Unistat\Unistat10\Unistat10.ini
Alternatively, you can also enter a full path for the macro file such as:
UsrBtn1=Z:\Network folder\user 1\My Macro
The file extension .usm should not be included in either case. You may create a second button by replacing 1 above with 2.
Before clicking on macro shortcut buttons ensure that the data present in the spreadsheet is compatible with the macro to be run.
