3.2. Edit Menu
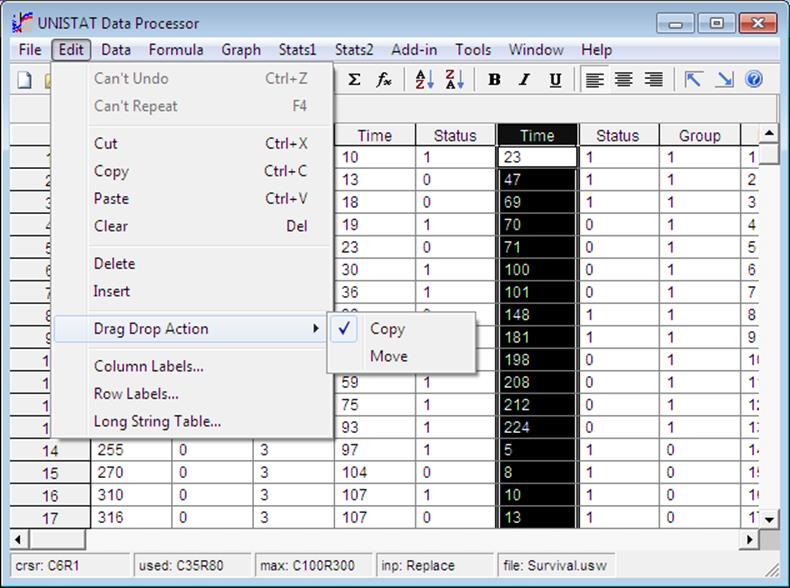
Most of the Edit menu options are also accessible from a pop up menu that can be activated by clicking the right mouse button.
3.2.1. Undo
A one level undo facility is available for all Data Processor operations that modify data. This option will restore the state of the spreadsheet before the last edit. The undo buffer is cleared when a graphics or statistics procedure is executed.
3.2.2. Redo
The last data editing operation is repeated. The redo buffer is cleared when you exit Data Processor to execute a procedure.
3.2.3. Cut
The highlighted range is copied to the Windows clipboard and the source range erased.
When the length of a column is greater than the end row number of the range, the erased portion of these columns will be filled with missing data.
Data copied to the clipboard is tab delimited; i.e. columns are separated by tab characters (ASCII 9) and rows are separated by carriage return characters (ASCII 13 + 10).
3.2.4. Copy
This is like cut, in that the highlighted range is copied to the clipboard, but the source range is not erased.
Data copied to the clipboard is tab delimited; i.e. columns are separated by tab characters (ASCII 9) and rows are separated by carriage return characters (ASCII 13 + 10).
3.2.5. Paste
The rules for pasting the contents of the clipboard are similar to those for opening CSV files (see 3.1.0.4. Delimited Text Files). The field and text delimiters selected in the Tools → Options → Data Export / Import 2 dialogue (see 2.4.1.6.1. Text Field Delimiters) will be in effect and they can be changed to accommodate different types of text in the clipboard. The default field delimiter is the tab character.
To obtain the best results observe the following rules:
1) If the data in the clipboard contains Column Labels then highlight the columns where this data is to be pasted. Otherwise Column Labels will be put into the first row and the data will be corrupted.
Likewise, if you wish to place the first column of the clipboard data into the Row Labels, highlight a few rows first.
If you wish to place the first row and the first column of the clipboard data into Column Labels and Row Labels simultaneously, highlight the entire spreadsheet by clicking on the top-left corner (cell 0, 0) first.
2) When using space as a column separator, either alone or alongside other delimiters, take care that Column Labels or String Data do not contain any spaces. For instance, if you attempt to copy a table into the clipboard with Row Labels like Fixed Capital, then Fixed and Capital will be put into separate cells unless they are enclosed within text qualifiers. This may cause a misalignment of columns of the table.
3) Do not cut or copy horizontal lines, etc. of a table in order to paste it into UNISTAT’s spreadsheet subsequently. These may cause confusion on the part of the program whether a column contains string or numeric data.
4) Although it is always possible to cut or copy text from UNISTAT’s own Output Window and paste it into the spreadsheet for further analysis, remember that these numbers will probably have been formatted for the output. We therefore strongly recommend that output tables are saved to spreadsheet by clicking on the UNISTAT button provided on the Data Processor’s Output Medium Toolbar. In this case the floating point numbers will be saved with the full 15 digits of precision. Also, in this way large tables will be saved in a single block – which may have been divided into several blocks in the Output Window in order to fit into the specified output width (see 2.4.1.2.3. Text Margins).
3.2.6. Clear
Highlighted range will be erased and the data will be lost. When the length of a column is greater than the end row number of the range, the erased parts of these columns will be filled with missing data.
3.2.7. Delete
A block of columns or rows can be deleted. The following actions are possible, depending on what type of highlighting you have had prior to selecting this option:
No block is highlighted: In this case, when Edit → Delete is selected, a daughter menu will provide two further options: Columns and Rows. If you select Columns, then the current column will be deleted without further notice. Likewise, the current row can be deleted by selecting Rows.
A block of cells is highlighted: As above, it is possible to select one of the Columns or Rows options to delete the range of columns or rows which the highlighted area covers.
A block of columns is highlighted: In this case the program understands that you wish to delete columns and accordingly it will not request further information Columns or Rows. The column range will be deleted and all columns to the right of the range will be moved to the start of the range. The highlight will not be switched off.
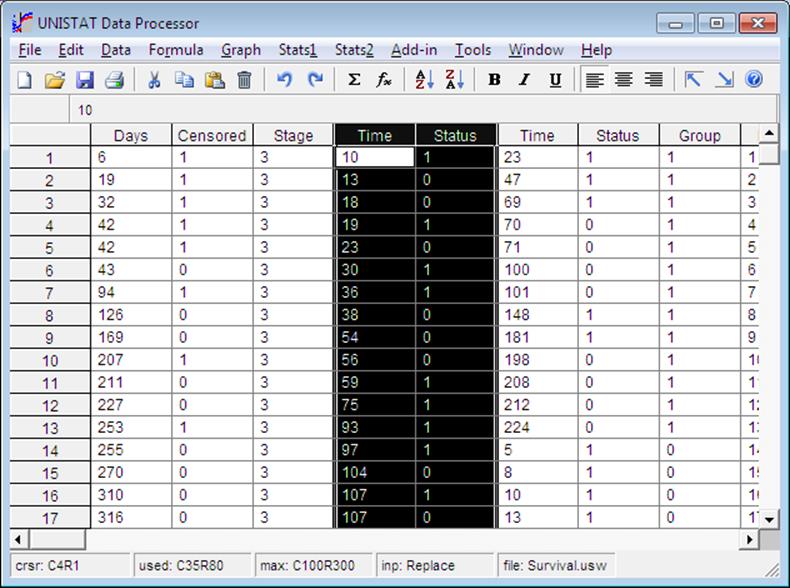
As in the case of inserting a range of columns, all formulas will be updated so that they will refer to the correct columns in their new positions. If, however, some of the columns which are to be deleted are referred to in functions, then their column numbers will be replaced by an exclamation mark (!). If such a formula is recomputed by the Compute Matrix procedure, or it is used without editing first, it will generate a Syntax Error message.
A block of rows is highlighted: In this case the program understands that it must delete rows and accordingly it will not request further information, Columns or Rows. The highlighted range of rows will be deleted and all rows below (including Row Labels) will be shifted up. All column lengths and thus the maximum number of rows used will be updated. Formulas will not be lost.
3.2.8. Insert
A block of columns or rows can be inserted. The following actions are possible, depending on what type of highlighting you have had prior to selecting this option:
No block is highlighted: When Edit → Insert is selected, a daughter menu will provide two further options; Columns or Rows. If the Columns option is selected, then a blank column will be inserted at the active cell location without further notice. Likewise, if Rows is selected, then a blank row will be inserted at the active cell location
A block of cells is highlighted: As above, select one of the Columns or Rows options to insert as many columns or rows as covered by the highlighted area.
A block of columns is highlighted: In this case the program understands that it must insert columns and accordingly it will not request further information, Columns or Rows. The column range will be inserted and all columns to the right of the start of the highlighted range (including Column Labels) will be shifted right by the number of columns inserted. The highlight will not be switched off.
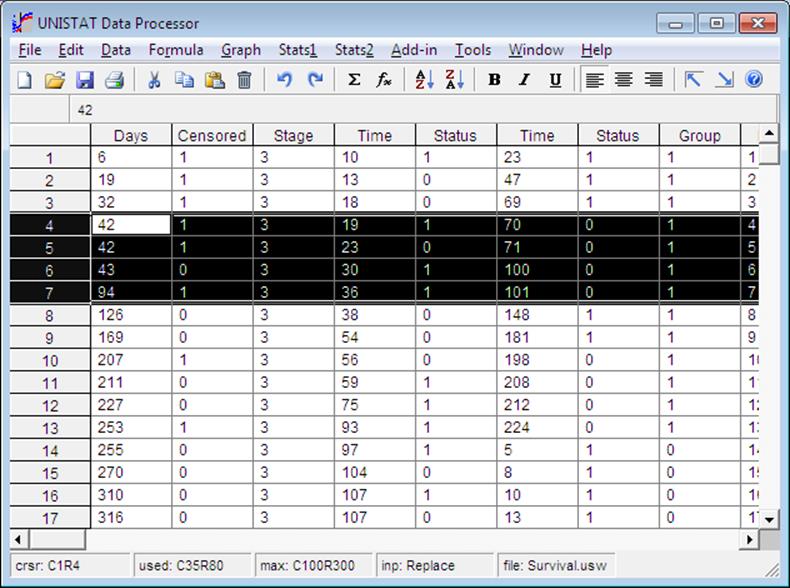
As in the case of deleting a range of columns, all formulas will be updated so that they will refer to the correct columns in their new positions. If there are insufficient empty columns in the Data Processor, then a prompt will be issued and the insert procedure will be aborted.
A block of rows is highlighted: In this case the program understands that it must insert rows and accordingly it will not request further information, Columns or Rows. The highlighted range of rows will be inserted and all rows below (including Row Labels) will be shifted down. All column lengths and thus the maximum number of rows used will be updated. Formulas will not be lost.
If the Data Processor does not have a sufficient number of empty rows, then a message will pop up and the insert procedure will be aborted.
3.2.9. Drag-Drop Action
When a range is highlighted (which can be a block of cells, a range of columns or a range of rows) and the mouse pointer (which has a plus shape) is placed on the boundary of the highlighted range, you will see that it changes into an arrow shaped pointer. At this point, you may press the left mouse button and drag the pointer. The outline of the block will move with the mouse pointer. Drag the block until it reaches its destination and then release the mouse button. The source will be copied to the new position.
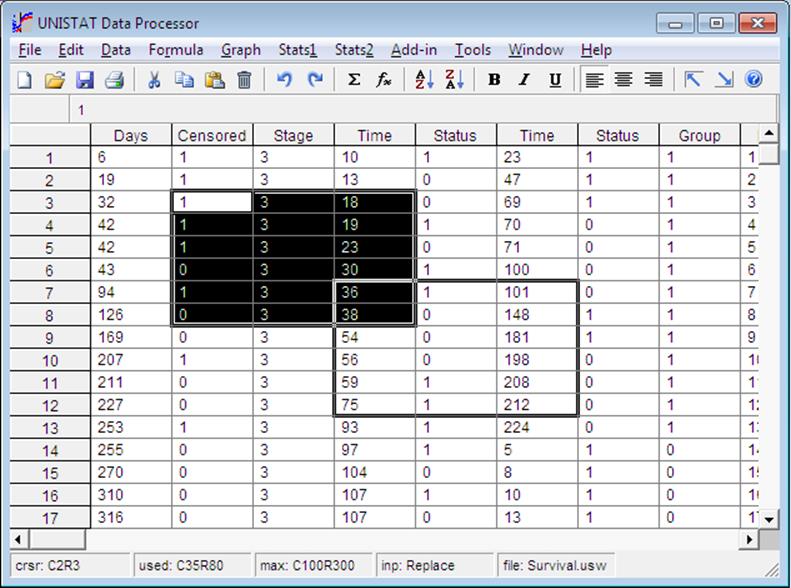
The Edit → Drag-Drop Action option may take two values: Copy or Move. The first option Copy is the default and will work as described above. If the Move option is selected, then copying will take place as described above. However, additionally, the source range will be erased.
3.2.10. Column Labels
The Column Labels can be entered, edited and cleared. It is also possible to enter a specified range of Column Labels automatically, by incrementing a given base number by integer values. You can also load Column Labels from a text file (see 3.1.0.5. Free Format Text Files and 3.1.0.6. Fixed Format Text Files).
To enter or edit a single column or row label at a time, double-click on the label. A text editor will be placed on the Input Panel. Enter or edit the label, and then click <Enter/OK>. To enter several Column Labels manually, select this item from the menu.
Like other Data Processor parameters, Column Labels are also saved as part of UNISTAT internal format files, and optionally as part of text, Excel, Lotus, dBase, DIF and Sylk files (see 3.1.0. File Formats).
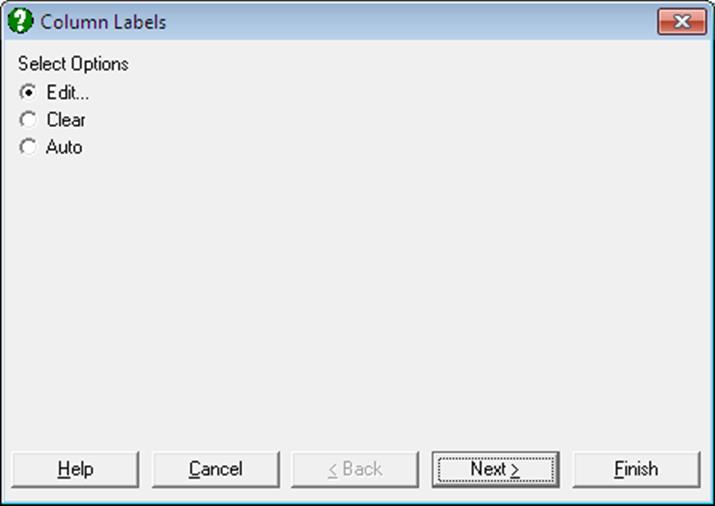
Edit: A single label can be edited or entered simply by double-clicking on a column label, without having to go through the Edit menu.
When the Edit → Column Labels → Edit option is selected from the menu, a window with six text fields and a vertical scroll bar will be displayed. Any string of characters, excluding parentheses ( and ), can be typed in.
WARNING! Pure numbers or string expressions starting with numbers cannot be entered as column labels.
If a number is entered, the program will automatically prefix it with the character A so that the label is not confused with a number in formulas. There are no limitations on the number of characters in labels (except for system limitations).
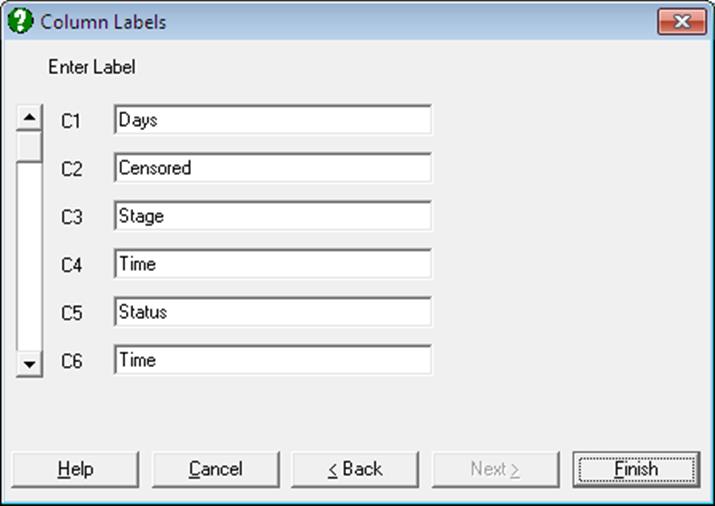
The display of Column Labels may be scrolled by cursor pad keys or clicking the mouse on the scroll bar. When a significant amount of editing has been done, do not forget to save the data in spreadsheet to a file.
Clear: All Column Labels will be erased. First a warning will be issued.
Auto: A range of Column Labels can be assigned automatically. Place the active cell at any row of the starting column first, then select Edit → Column Labels and select Auto from the list. An input field will be placed on the Input Panel. Type the base string, let us say Var, followed by a hash sign #, and followed by the number of columns to be labelled, say 5. The Input Panel would look like this:
ENTER COLUMN LABELS: Var#5
Pressing <Enter/OK>, the current column and the following four columns will be automatically assigned labels Var1, Var2, …, Var5. Remember that pure numbers cannot be assigned as Column Labels.
3.2.11. Row Labels
It is possible to enter or edit individual Row Labels or to assign one of daily, monthly, quarterly, six monthly or annual annotations automatically to all rows, up to the maximum row in use. It is also possible to load Row Labels from a text file (see 3.1.0.5. Free Format Text Files). There are no limitations on the number of characters in labels (except for system limitations).
To enter or edit a column or row label individually, double-click on the label. A text editor will be placed on the Input Panel. Enter or edit the label, and then click <Enter/OK>. To enter a number of Row Labels manually, select Edit → Row Labels from the menu.
Like other Data Processor parameters Row Labels are also saved as part of UNISTAT internal format files, and optionally, of text, Excel, Lotus, dBase, DIF and Sylk files.
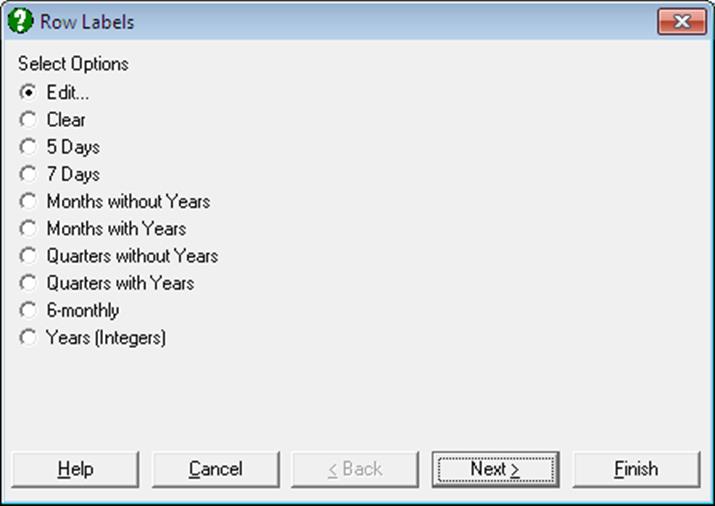
A dialogue will provide access to the following options:
Edit: Individual labels may be edited or entered simply by double-clicking on a label, without having to go through the Edit menu.
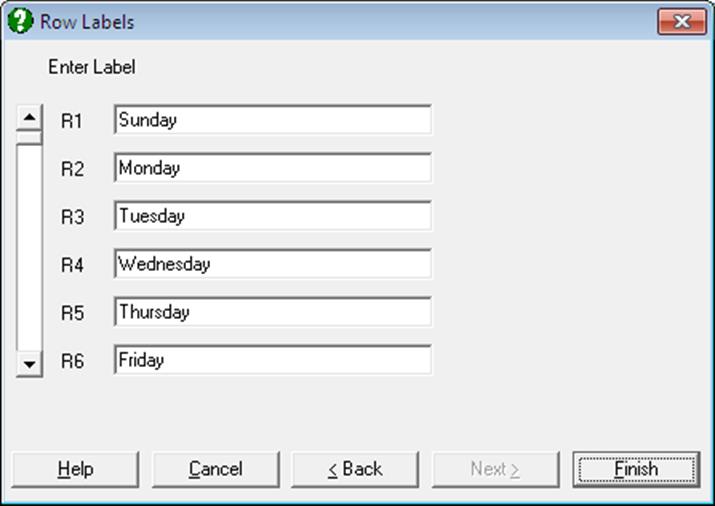
When the Edit → Row Labels → Edit option is selected from the menu, a window with six text fields and a vertical scroll bar will be displayed. Unlike Column Labels, pure numbers or string expressions starting with numbers can be entered as Row Labels.
It is possible to scroll the display of Column Labels by arrow keys or clicking the mouse on the scroll bar. When a significant amount of editing has been done, do not forget to save the data in spreadsheet to a file.
Clear: This option will erase all Row Labels. A warning will be issued first.
Working Days (5 Days): An input field will be placed on the Input Panel. Enter the first three letters of the working day (e.g. MON, WED) for the first label (i.e. for row 1). The program will then work out and fill all Row Labels up to the maximum row number in use with consecutive working days.

Days of Week (7 Days): Enter the first three letters of the day (e.g. SUN, SAT) for the first label. The program will then work out and fill all Row Labels up to the maximum row number in use with consecutive days of the week.
Months without Years: Enter the first three letters of the month (e.g. JAN, AUG) for the first label. The program will then work out and fill all Row Labels up to the maximum row number in use with consecutive months.
Months with Years: Type in the year (e.g. 1989, 1817) followed by a semicolon and then either the first three letters of the month (e.g. JUN, DEC etc.), or the number of the month (1-12). The date entered is for the first row. The rest of the labels up to the maximum used will be assigned by the program automatically.
Quarters without Years: Enter the first three letters of the quarter (WIN, SPR, SUM, AUT) for the first label. The program will then work out and fill all Row Labels up to the maximum row number in use with consecutive quarters.
Quarters with Years: Type in the year (e.g. 2010, 1953), followed by a semicolon, and then either the first three letters of the quarter (WIN, SPR, SUM, AUT) or the number of the quarter (1 to 4) for the first row of the display.
Six-Monthly: Type in the year, followed by a semicolon, and then the number of the half-year (1 or 2) for the first row. There are no string alternatives for the numbers 1 and 2.
Annual (or Integers): Type in the year for the first row. This option may also be used to assign row numbers as Row Labels, by entering 1 for the first row. This may be useful in labelling points in 2D Plots and 3D Plots procedures.
3.2.12. Long String Table
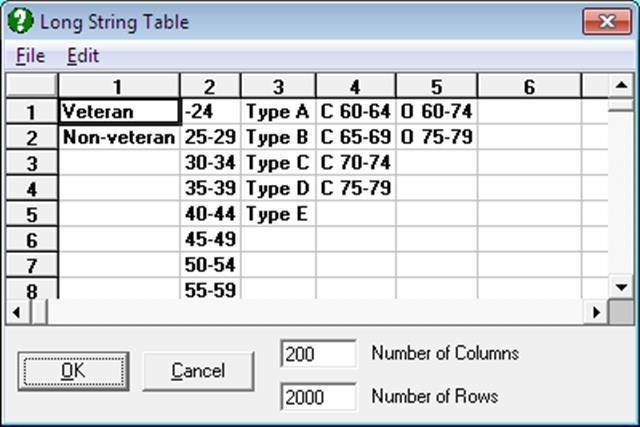
The Edit → Long String Table dialogue consists of a grid containing the String Data and two text boxes displaying the dimensions of the table. If no files containing long strings have been opened before, or no long strings have been typed into the Data Processor manually, the string table will be blank on entry. At this stage, you can type any strings into the table. Row numbers of the table correspond to the integers by which these strings are represented in Data Processor. Suppose, for instance, we type the values 25 C, 30 C, Amb RH, 05 – 30 C and 05 – 30 C Ambient into the first four rows of the second column of the string table respectively. We then click [OK] and accept the changes and go back to the Data Processor. Also suppose that we have a column in our data sheet that contains a succession of integers from 1 to 4, say, 1, 1, 3, 2, 4, 3, 2, 3, 3, 4, 3, 2.
But how are we going to make UNISTAT display the strings entered into the table instead of these integers? In other words how shall we establish a correspondence between the columns of the data sheet and the Long String Table? This task is performed by entering a special data conversion function Long(n) (see 3.4.2.6.1. Data Conversion Functions). All we need to do is to click somewhere on the column containing the integers, press <=> (the equal sign) and then enter Long(2). The data sheet will be redrawn immediately and the long strings will be displayed instead of integers. Cells containing 1 will now display the string 25 C, cells containing 2 the string 30 C, Amb RH, etc. The correspondence established in this way can be cancelled by entering the special data conversion function Data, in which case the column will display the integers again.
When you wish to change all strings represented by an integer, you need to activate Edit → Long String Table and make the change in the string table. If you edit a long string cell in Data Processor, this will be accepted as a new manual String Data entry and it will be added to the corresponding column in the string table at the next free row.
You can also convert a long string column to a short string column using the Short function. However, you must not forget that this function will truncate the string values longer than eight characters.
Changing the type of – or even deleting – a long String Data column will not change its corresponding Long String Table entries. This is because there may be other long string columns in Data Processor that also reference the same Long String Table entries.
The default dimensions of the Long String Table are 200 columns by 2000 rows, but this can be changed if desired. Any changes made to these numbers will be valid during a UNISTAT session. Next time UNISTAT is launched, the default values will be restored. If you want to change the default values permanently, enter and edit the following lines in Documents\Unistat10\Unistat10.ini file under the [Options] group:
MaxStringVars=200
MaxFactorLevel=2000
The Number of Rows parameter also determines the maximum number of levels (i.e. distinct values) in factor (i.e. categorical) variables. If you attempt to run, for instance, an ANOVA model with a factor variable that has more than 2000 levels, the program will stop and ask you to increase this parameter.
